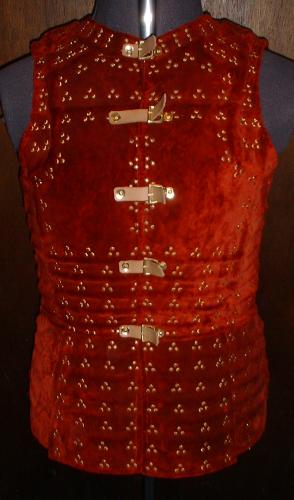
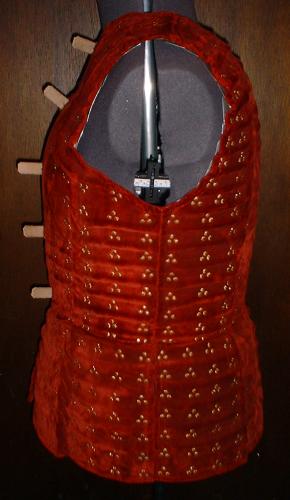

Mid-15th Brigandine
Finished Jan. 1, 2004
This
brigandine is sized for someone who's height is 5'10" (178cm) with a 42" (107cm) chest and a
35" (89cm) waist. There is enough room under the brigandine for a padded arming double or heavy
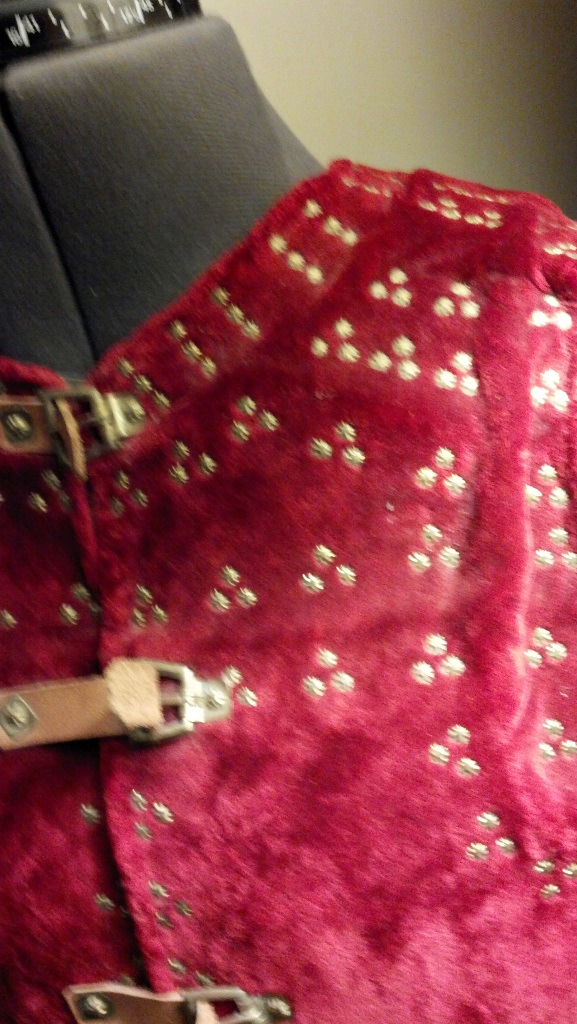
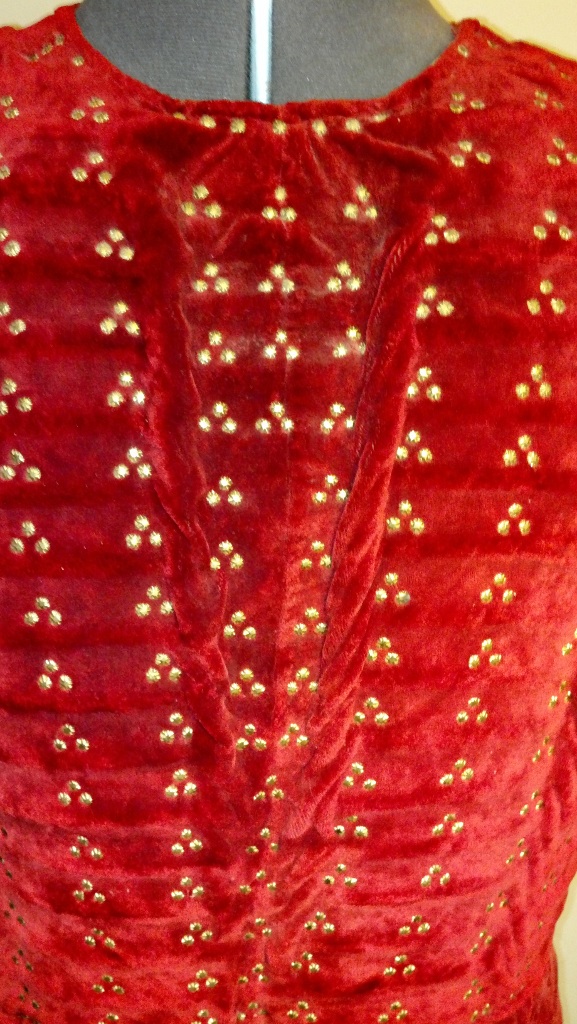
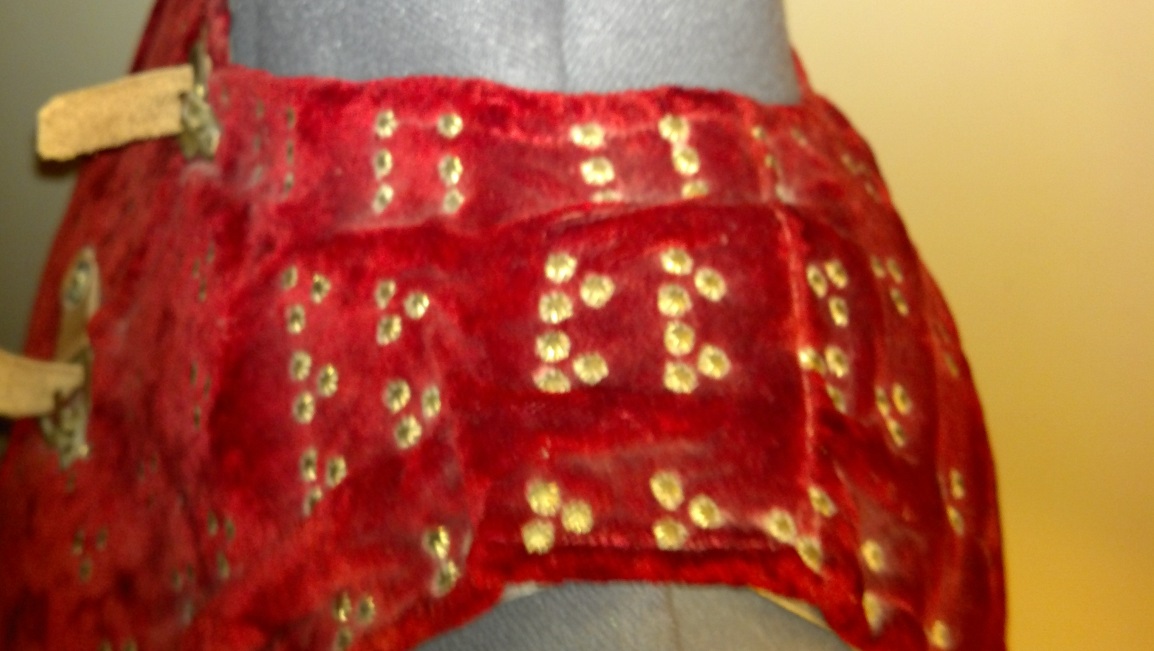
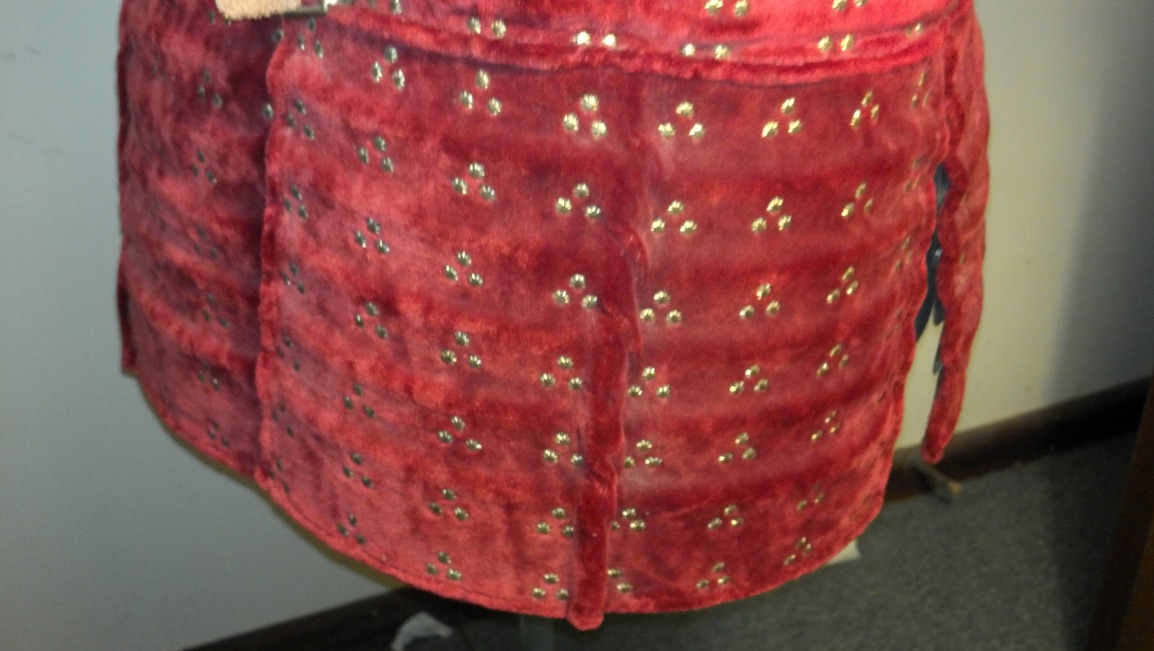
wool doublet. The cover fabric is an upholstery weight velvet with a 100% silk pile and backing
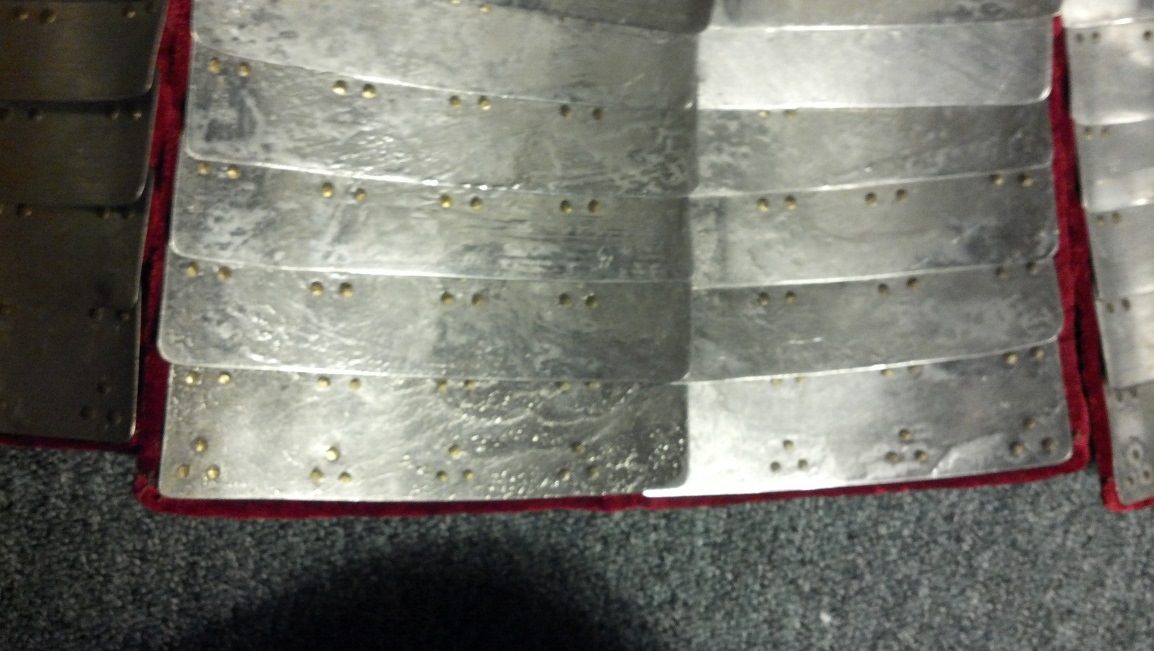
fabric is a 16oz. hemp twill. All the plates are 0.035" (~0.9mm) thick 1050 (0.5% carbon) spring
steel except for the lung and demi-lung plates which are 0.050" (~1.3mm) thick 1050 spring steel.
All the plates have been tinned and the brigandine nails are custom 14ga. brass cut nails with
a raised radiating line pattern on the head.
Patterns for this Project
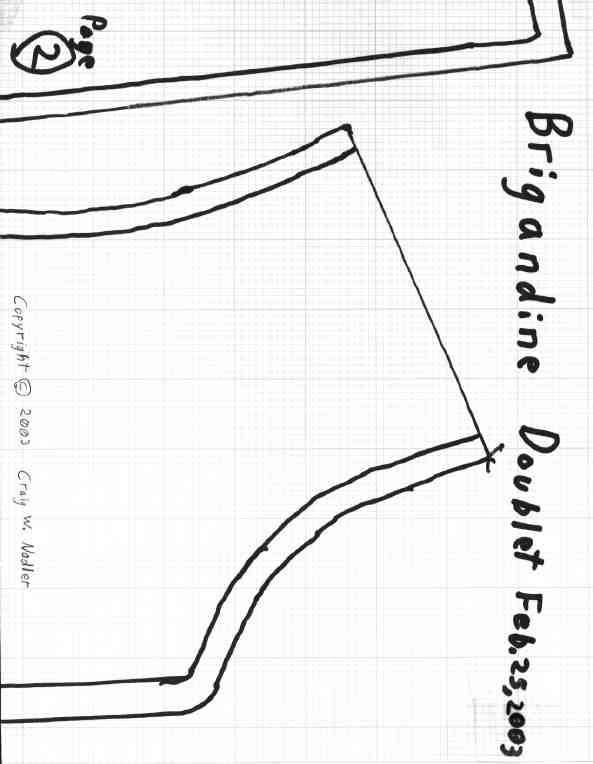
Adjust the pattern for the inner layer of the doublet as
needed to make a cardboard pattern for the size brigandine you wish to make. Cut the adjusted pattern out of cheap
but fairly heavy fabric such as canvas. Sew the four panels of the upper body together using a very low stitch
count (i.e. large stitches) so that you can undo the stitching later. Make any adjustments to the doublet pattern
that are needed. While you're checking the pattern you will need to wear whatever you plan on wearing under the
brigandine. You should also wear two extra T-shirts to account for the room taken up by the plates. Sew the four
peplums (lower quarter panels) on and make any adjustments that are needed. Undo all the stitching then use the
panels to adjust your cardboard pattern.
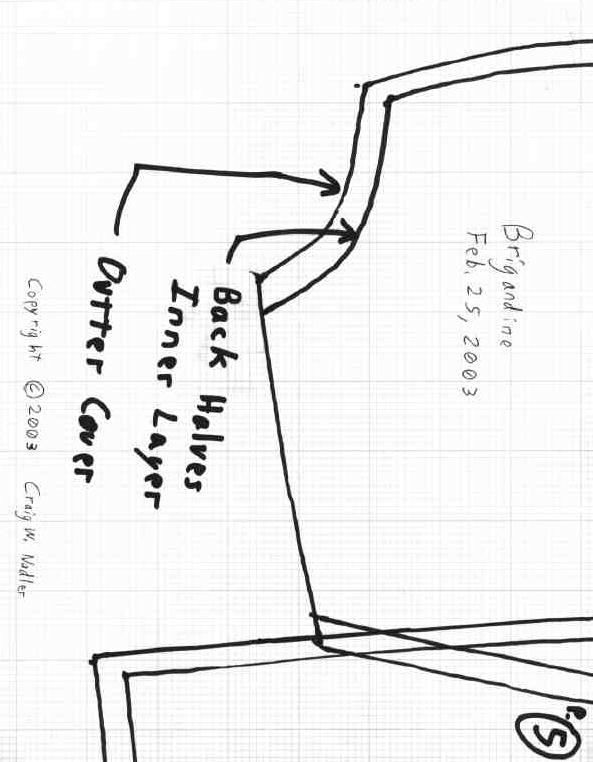
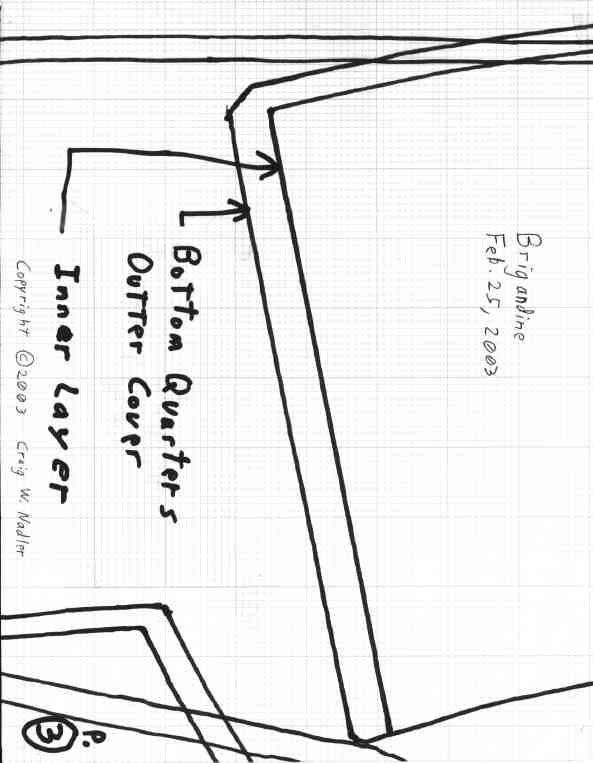
If you look at the original pattern for the inner and
outer layers of the doublet you will see that the panels for the outer layer extend past the panels of the inner
layer on some edges. When all the panels of each layer are sewn together the outer layer will be attached to the
inner layer by wrapping about 3/8" of the edges of the outer layer around the inner layer and sewing them in place.
Some of the extra material on the outer layer also adjusts of the slightly greater distance around the body because
it's on top of the inner layer. Use the adjusted pattern for the inner layer to create a pattern for the outer
layer.
Use the adjusted pattern to cut out all 16 panels of the
doublet. Sew the four panels of the upper body together for the both the inner and outer layers. Be sure to finish
all the edges of the panels by stitching over the edge or with a surger. Attach the inner layer to the outer layer
by wrapping about 3/8" of the edges of the outer layer around the inner layer and sewing it in place. Finish the
edges of all the peplum panels. Attach each outer peplum panel to an inner panel in the same manor as with the
upper body except that the top edge of outer peplum panels don't wrap around the inner panel. I find it easier
to attach the peplums to the upper body after all the steel plates except for the waist plates have been
attached.
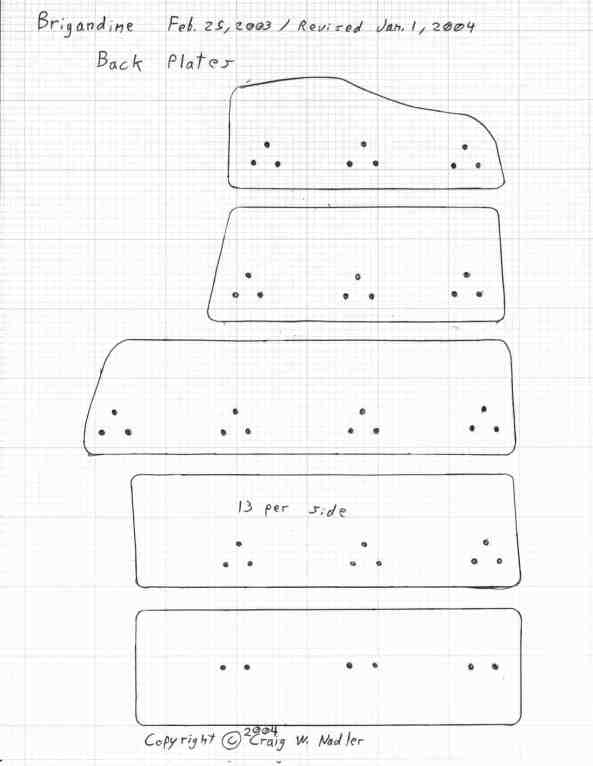
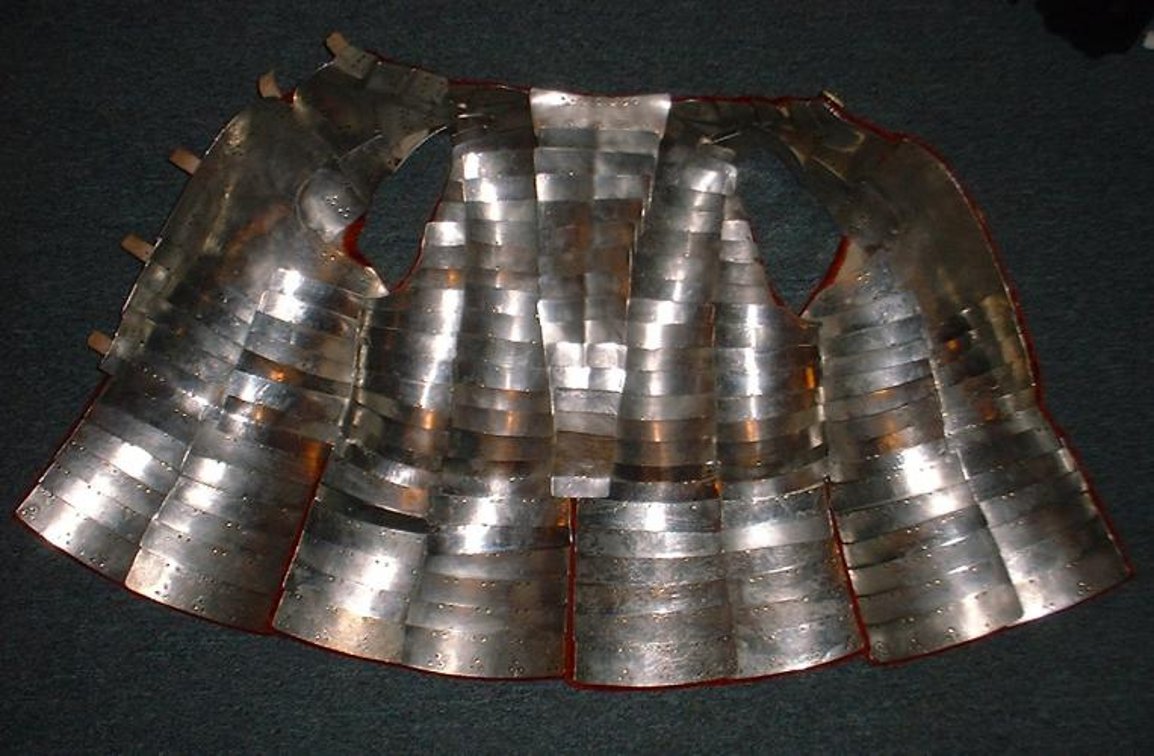
You will need to draw the pattern on the inside of the
upper body using a pencil. The brigandine plates are divided into 9 vertical plate groups. You will need to first
mark the dividing lines between these plate groups then mark where the bottom edge of each plate will be for plates
on the upper body or where the top edge will be for plates on the peplums. The process of drawing the pattern
on the inside of the doublet will account for any difference in the chest and waist measurements by making plates
longer or shorter. If the brigandine is sized for someone taller or shorter then 5'10" (178cm) you may need to add
or subtract plates to each group. If any changes in size are made you will need to adjust the size of some plates
such as the lung, demi-lung, collar, arm hole, and shoulder plates. You need to adjust the patterns for the
plates as you're drawing the plate positions
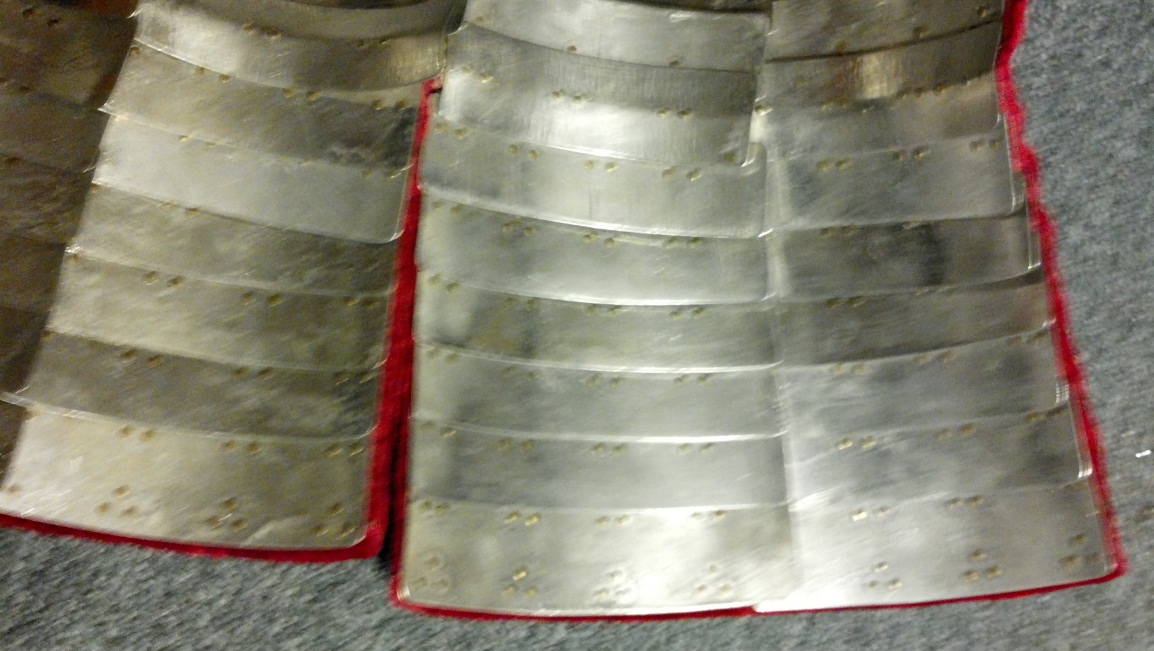
All plates on the peplum overlap the plate below except for
bottom plates. Most of the plates on the upper body overlap the plate above it except for some of the plates above
the lung plates and on the shoulders. The waist plates overlap both the plate above and below it. The plate groups
starting with the two in the front are overlapped by the plate groups next to them, going back to the plate group
over the spine, which overlaps the plate groups to either side of it.
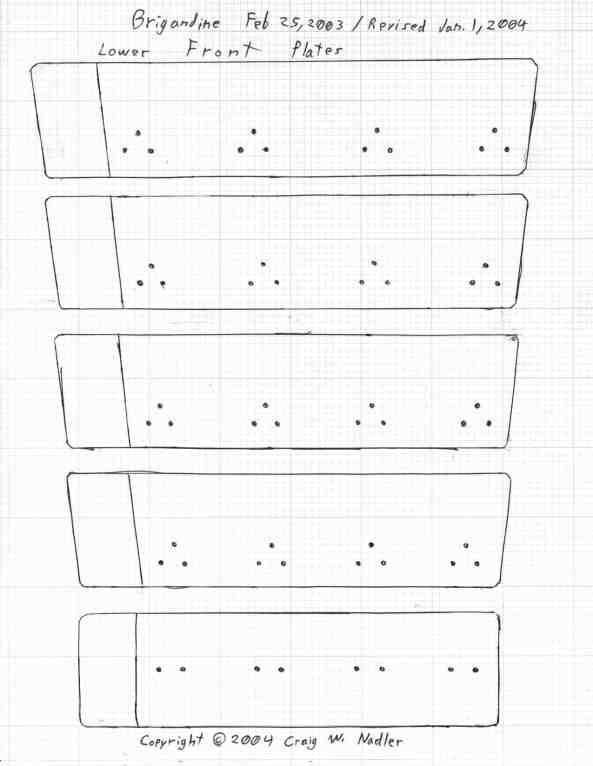
We will start with marking the pattern on the two front
panels of the upper body. Mark the center of the bottom edge of each of the front panels. Note the measurement
from either side to the center point along the bottom edge. Just below the arm hole measure across the front panel
starting at the seam under the arm hole keeping the ruler level with the bottom edge of the panel and make a mark
the same distance from the seam as the center point on the bottom edges is from either side of the panel. This mark
should be a bit off center. Using a ruler draw a line from the center of the bottom edge through the mark at the
level of the bottom of the arm hole and continue on until the line goes off the edge of the fabric. This line divides
the two plate groups on each front panel. Starting at the bottom of the panel measure up the dividing line making a
mark at 1", 2.25", 3.5", 4.75", 6", 7.25", and 8.5". Starting at the bottom of the panel measure up the seam
under the arm hole make a mark at 1", 2.25", 3.5", 4.75", 6", 7.25", and 8.5". Starting at the bottom front corner
of the panel measuring along the front edge make a mark at 1", 2.25", 3.5", 4.75", and 6". Draw horizontal lines from
the marks on the front edge and the seam under the arm hole to the marks at the same distance on the dividing line.
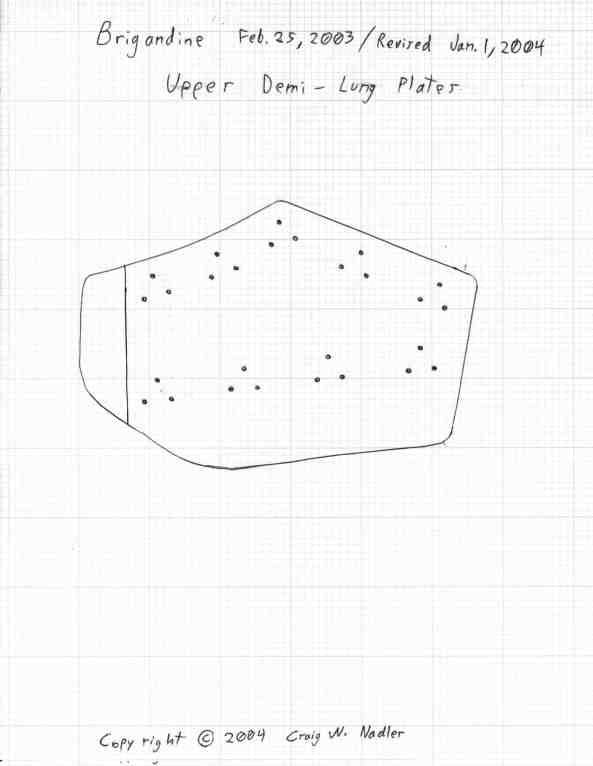
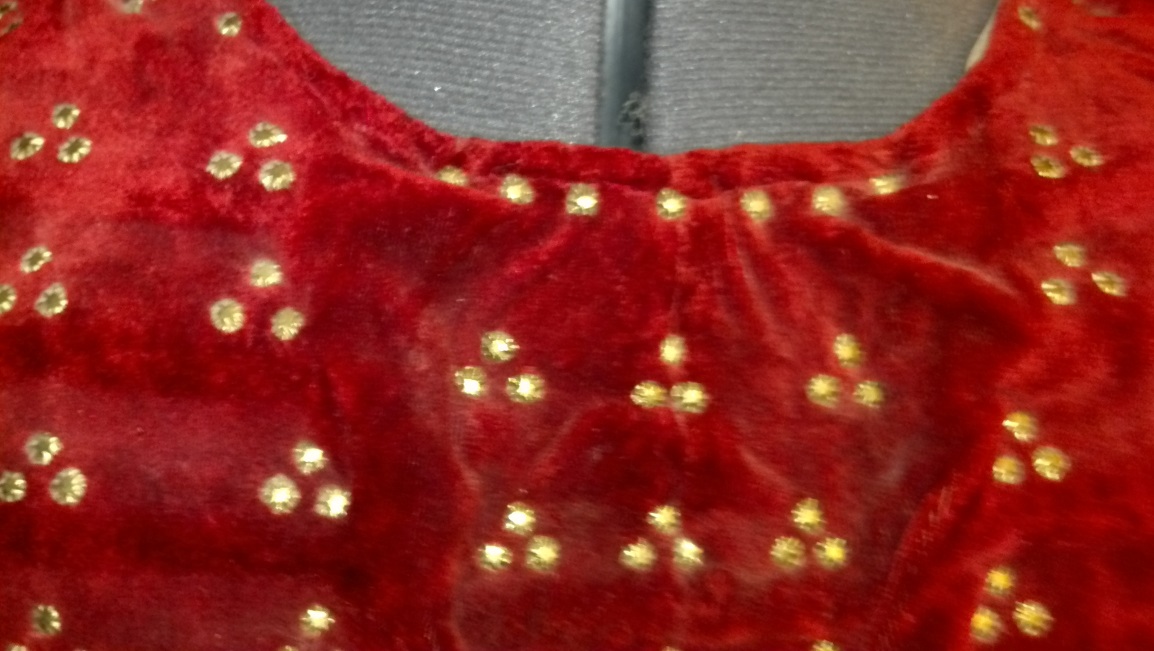
Take the paper pattern for the collar plate which is next to
the front opening of the brigandine and place so that the center of the nail holes along that edge are 3/8" from the
edge of the fabric. The top edge of the pattern should be 1/16" from the edge of the fabric which forms the opening
for the neck. Draw a line along the side of the pattern that is away from the front opening. Draw a light dotted line
along the bottom edge of the pattern then remove the pattern and draw a solid line 1/4" above the dotted line. The
solid line is where the top of the demi-lung plate will be placed which the collar plates overlapping it. Take the
paper pattern that's used for the next three collar plates and place it so that the edge near the front opening
overlaps the previous collar plate by 1/4". Repeat the process used for marking the edge placement on the first
plate. The last collar plate only has three side so you just have to mark the lower edge with the dotted line and draw
the solid line 1/4" above that.
Take the paper pattern for the demi-lung plate and lay it in
it's place. Draw a line along the edge that's towards the shoulder and the edge that is directly away from the front
opening. Take the paper pattern for the front shoulder plate and place it with the edge on the solid line around the
collar and with it overlapping the demo-lung plate by 3/8". Draw a line along the edge closest to the arm hole and draw
a dotted line along the short edge at the top of the shoulder. Take the paper pattern for the back shoulder plate and
place it with the edge on the solid line around the collar and with it being overlapped by the front shoulder by 3/8".
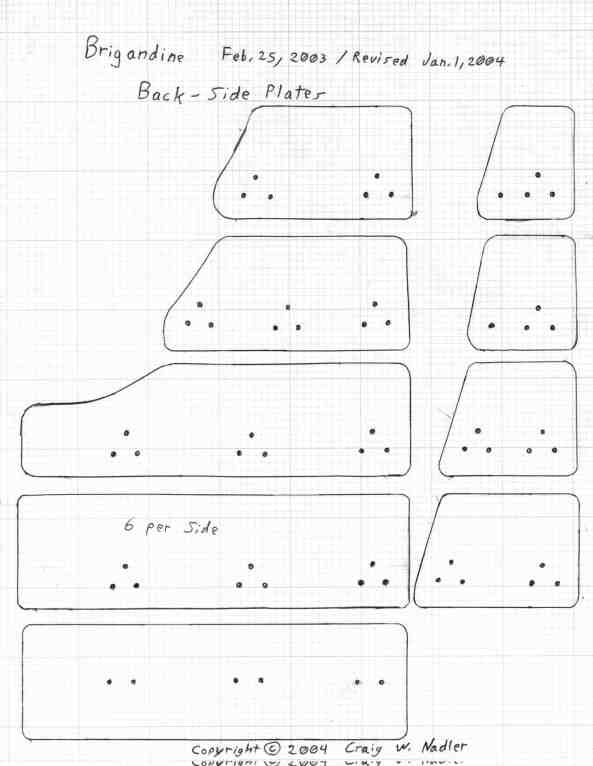
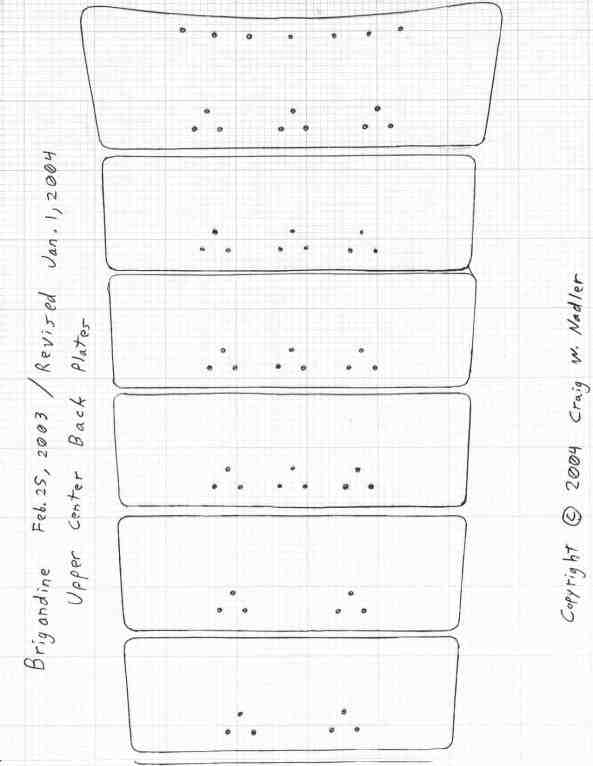
There are 6 small plates which fill in the gap next to the
lung plate and run up the side of the arm hole to just over the shoulder. The pattern for the small square plate is
used for the last two plates in the back of the shoulder. Take the paper pattern from the shoulder page that is in
the top center of the page. Place it in the gap next to the lung plate and check to see that it fits when it's
overlapping the lung plate by about 1/4". The edge of the plate next to the arm hole should be 1/16" from the edge of
the fabric. Draw a line along the top edge of the plate. Take the paper pattern from the shoulder page that is in the
top left corner. Place it next to the demi-lung plate so that the side with groups of holes in it is 1/16" from the
edge of the fabric. The groups of three holes should be pointing up. The plate should overlap the demi-lung plate and
the plate below it by about a 1/4". The overlap of the plate below it will be a bit off because the lung plate will be
dished before it's attached. Draw a line along the top edge of the plate pattern and a dotted line along the bottom
edge. Take the paper pattern from the shoulder page that has three groups of three holes with one of the groups facing
the other two. Place this plate along side the back shoulder plate with the groups of holes towards the arm hole and
with the one odd group of holes towards the back. The plate should overlap the back shoulder plate by about a 1/4".
Draw lines along the top and bottom edges of the plate pattern. Take the paper pattern from the shoulder page that is
the second one from the top on the left side. Place this plate along side the front shoulder plate with the groups of
holes towards the arm hole and check that it overlaps the plates above and below it by about a 1/4". Draw dotted lines
along the top and bottom edges of the plate pattern. Take the pattern of the small square plate in the bottom left
corner of the shoulder page. Place it along the arm hole behind the plate that overlaps the back shoulder plate. It
should overlap the plate above it by a 1/4". Draw a line along the edge of the plate pattern that's away from the
previous arm hole plate. Draw a dotted line along the edge that's away from the arm hole then draw a solid line a 1/4"
closer to the arm hole. Use the same pattern to mark in the same manor the position of the second small square plate
that's behind the previous one.
Now we will mark the pattern on the two back panels of the
upper body. At the bottom edge make a mark 1" to either side of the seam that is over the spine. Measure from that
mark to the seam under the arm hole and mark the center point between the two. Note the measurement along the bottom
edge from the seam under the arm hole to the mark you just made. Just below the arm hole measure across the back panel
starting at the seam under the arm hole keeping the ruler level with the bottom edge of the panel and make a mark the
same distance from the seam then make another mark the same distance from the mark you just made. Using a ruler draw
lines from the two marks on the bottom edge to the marks above them at the level of the bottom of the arm hole. Make
marks along these two lines and the seam over the spine measuring from the bottom at 1", 2.25", 3.5", 4.75", 6", 7.25",
8.5", 9.75", 11", 12.25", 13.5", 14.75", 16", 17.25", and 18.5". Make marks going up the seam under the arm hole and
along the edge of the arm hole at the same distances from the bottom edge. Do not measure along the curved edge of the
arm hole, the marks need to be made with the distances measured from the bottom edge directly below each mark. Draw
horizontal lines between all the marks which are the same distance from the bottom edge. Make sure that the top two
lines are even with the position of the two small square arm hole plates.
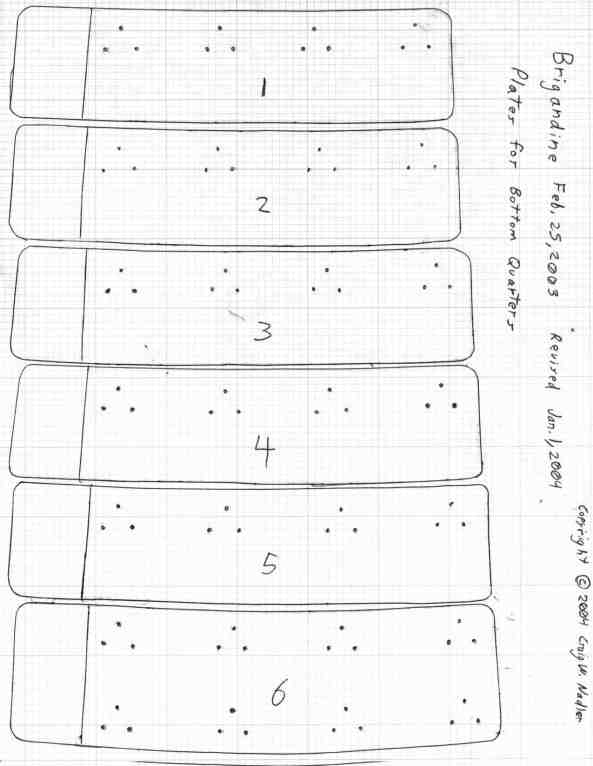
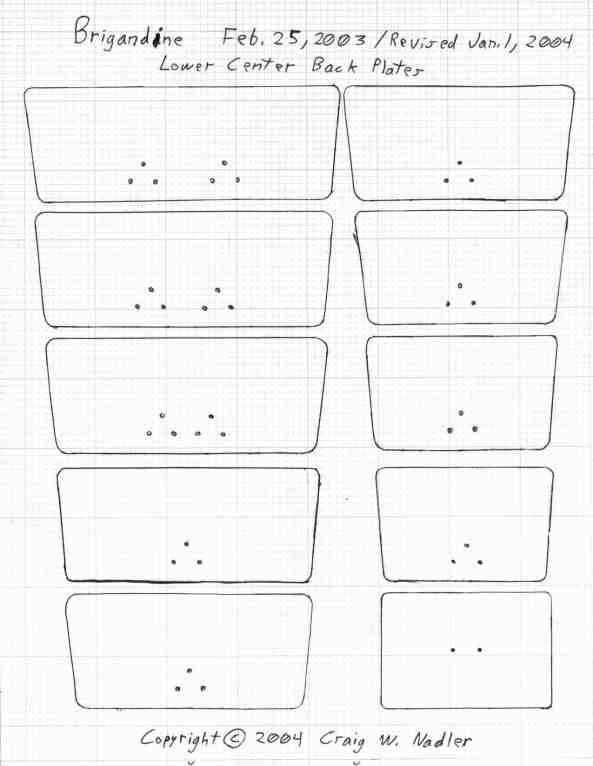
Now we will mark the pattern on the four peplums. Mark the
center points on the top and bottom edges of each peplum and draw a vertical line between them. Make marks along the
center line and both sides of each peplum measuring from the top 0.75", 2", 3.25", 4.5", 5.75", and 7". Draw
horizontal lines between all the marks which are the same distance from the top edge.
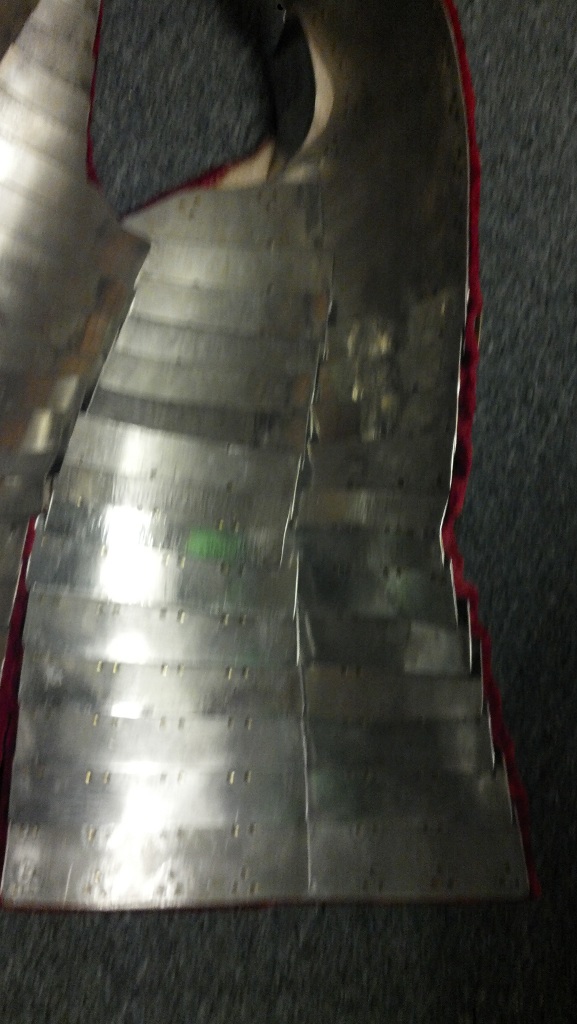
There are 83 plates which are 1.6" wide and the top and
bottom edges are parallel. A great deal of time can be saved by having steel cut to this width by a machine shop or
buying a 1.6" coil of steel. A 50 foot coil should be enough for someone who wears a men's size large shirt.
Cut out all the plates, finish the edges, and shape them. If
you want to heat treat and/or tin the plates see the instructions for that on the
brigandine info page.
The plates should be attached to the doublet using 14 or 12
gauge nails. The point of the nail allows you to pass the shaft through the fabric without ripping it. The first
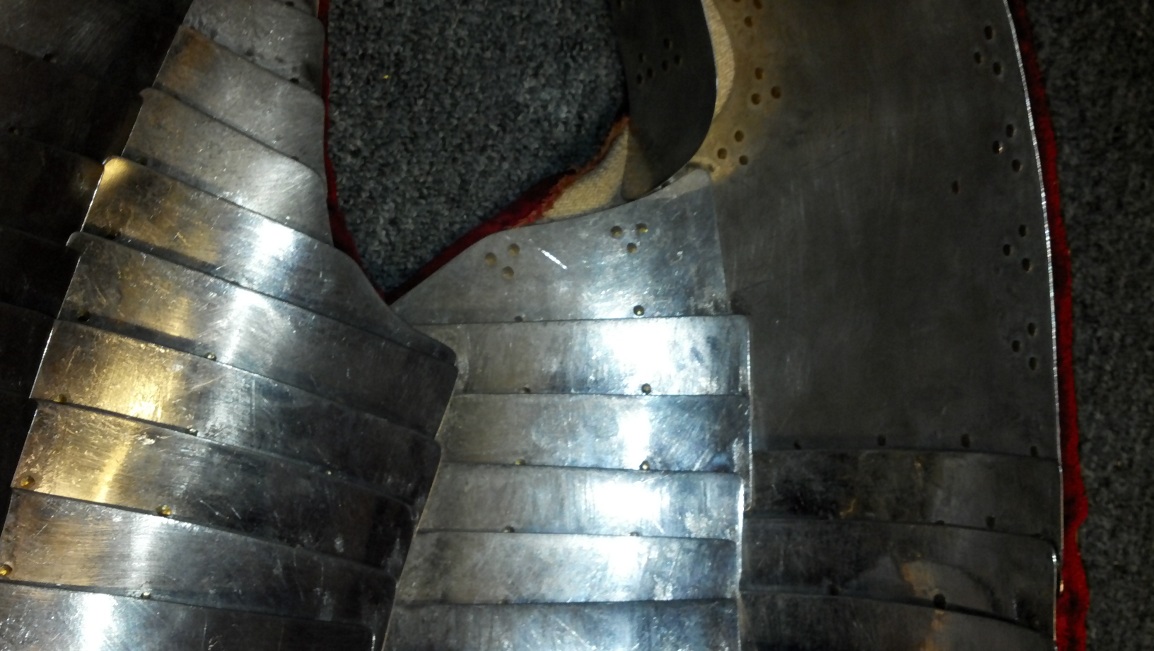
plates to be attached on the upper body are the lung plates in the front over the chest. Be sure that the lung plates
have been shaped correctly so that you get a good fit. To either side of the opening in the front of the doublet the
last horizontal line is 6" above the bottom edge of the panel. Position the lung plates with bottom edge of the plate
on those lines. The lung plates on the right side (if you're wearing it) extends past the edge of the fabric. The edge
of the lung plate along the front opening needs to be placed so that the center of the nail holes along that edge are
3/8" from the edge of the fabric. To hold the plate in position pass a nail through the hole in the bottom front
corner of the lung plate and through the fabric. The nail head should be on the inside of the brigandine. Then pass a
nail through the hole in the top front corner of the lung and through the fabric making sure that the fabric between
the two nails is pulled tight across the lung plate. Repeat this process for the other three corners on the lung
plate making sure that the fabric pulled tight across the lung plate. Remove the bottom front corner nail and insert a
nail through the hole left in the fabric and through the hole in the lung plate. The nail head should be on the
outside of the brigandine. Place the nail head on an anvil and use a pair of nippers to clip off as much of the nail
shaft as you can. You may need to grind down the front of the nippers get in closer to the plate. Using a 4oz. ball
peen hammer peen the end of the nail shaft into the shape of a low dome. Repeat this process for the other temporary
nails that are holding the lung plate in place. Fill in the rest of the holes except for ones used to attach the
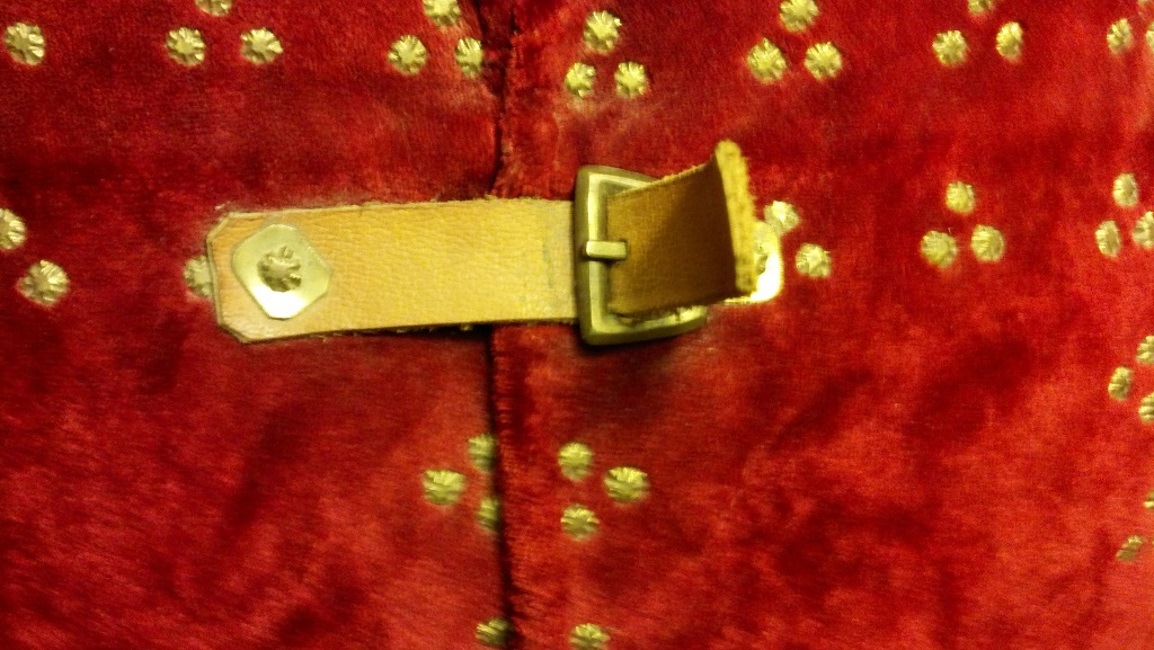
straps and buckles which hold the front of the brigandine closed.
Attach the demi-lung plate above the lung plate. Attach the
back shoulder plate then attach the front shoulder plate which will overlap the back shoulder plate and the demi-lung
plate. Attach the collar plates starting from the front opening and working your way back. Attach the arm hole plate
which goes next to the lung plate then attach the one which goes next to the demi-lung plate. Attach the arm hole
plate that goes next to the back shoulder plate then attach the one that goes next to the front shoulder plate.
Next attach the four plates that are located under the lung
plates. The plates need to be attached one at a time from top to bottom. Use two temporary nails on either end of the
plates to hold it in place while attaching them to the doublet. Always make sure that the fabric is pulled tight over
the plates before attaching them. Also be sure that you pull on the inner and outer layers of the doublet evenly or
you could end up with excess fabric in one layer when to get the bottom edge or the seam over the spine.
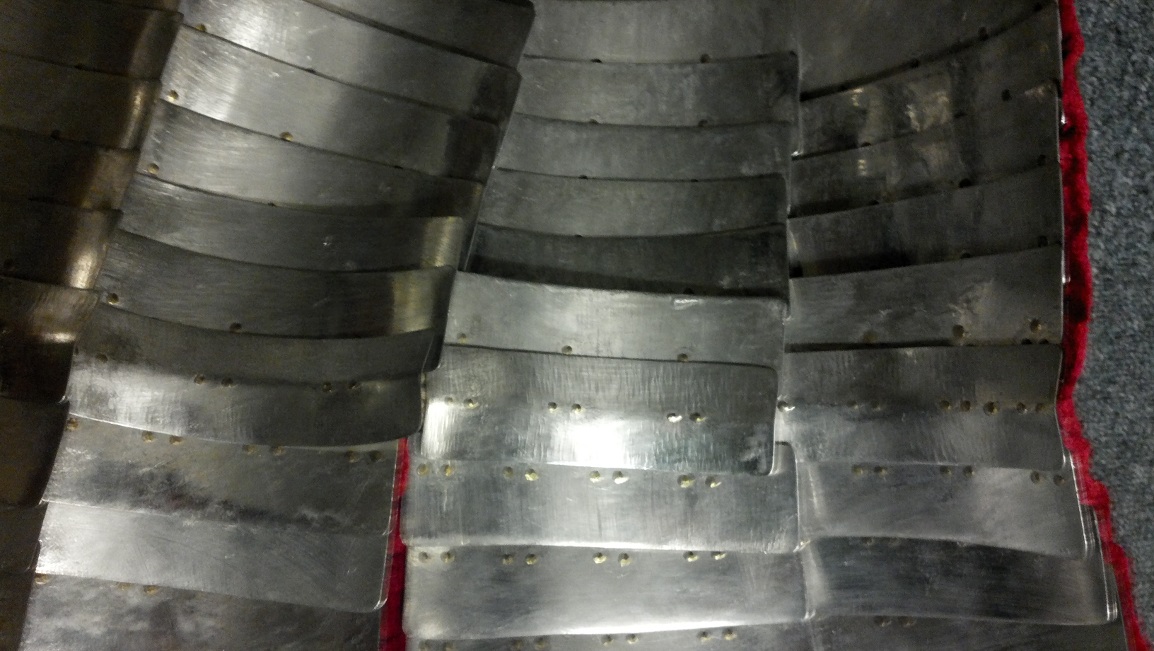
Continue to attach the next plate groups on the upper body
working your way back to the plate group over the spine. When you start a new plate group first attach the top most
plate which doesn't overlap any other plates and then work your way down the plate group. Please note that when you
get to the plate groups to either side of the group over the spine the first two plates will have small square arm
hole plates next to them. The arm hole plates will overlap the plate they are next to by about a 1/4".
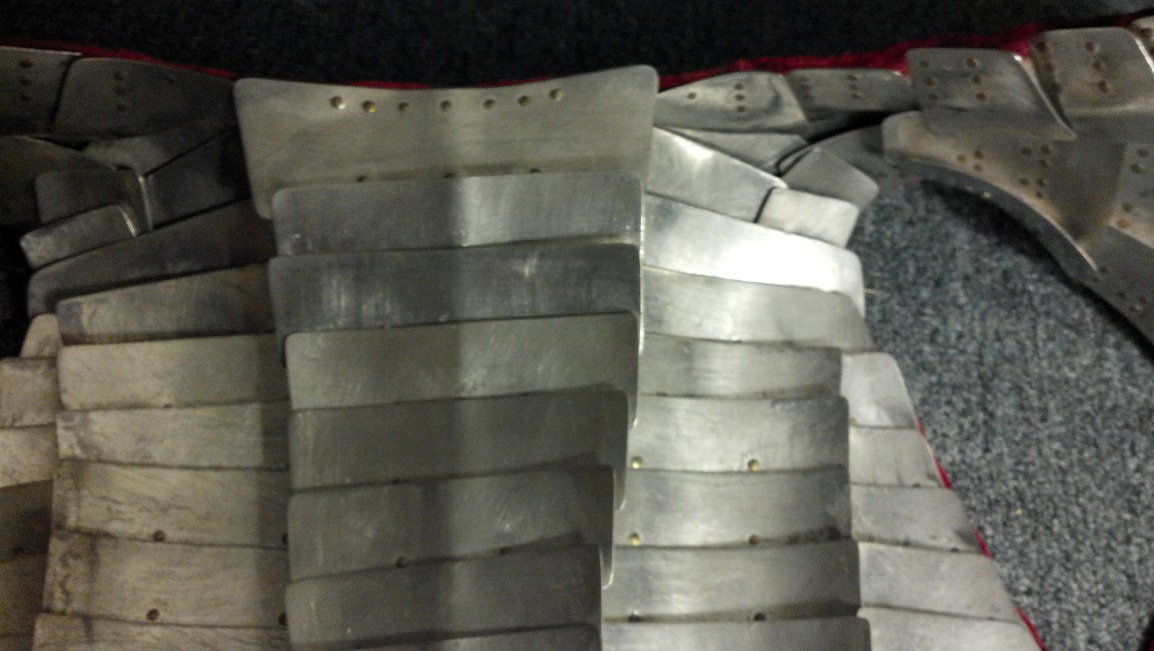
Attach the plates to peplums starting with the bottom plates
and working your way. Be sure that two of the peplums have the right plate group overlapping the left and that the
other two peplums have left overlapping right. Sew peplums on the bottom of the four panels of the upper body. Be
sure that the way the plates overlap on the peplum is that same way that they overlap on the panel of the upper body
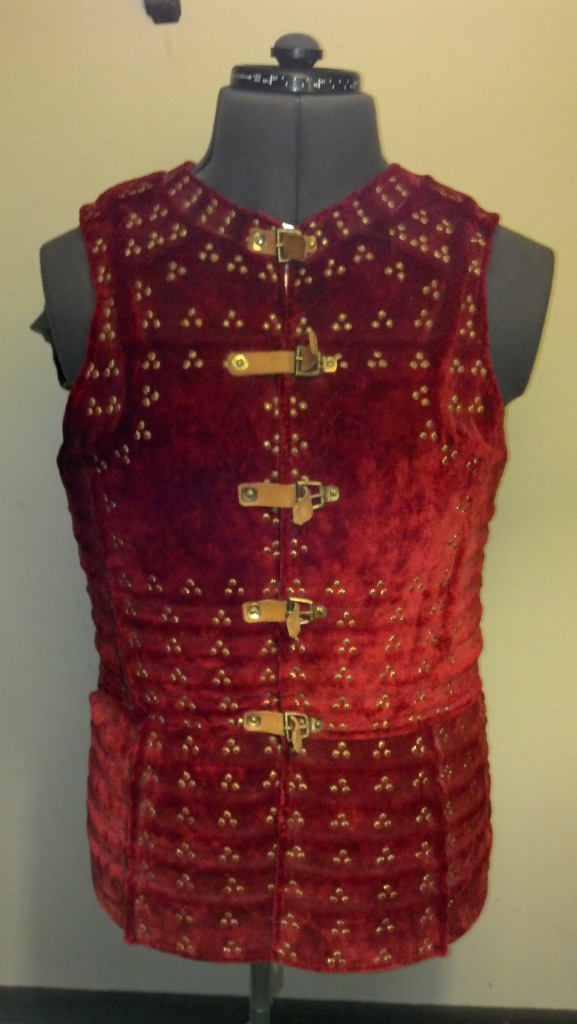
you're sewing it to. Attach the waist plates starting from the front on both sides and working your way back to the
spine. Attach the straps and buckles used to close the front of the brigandine.


Copyright 2012 Craig W. Nadler All rights reserved